Easiest Way to Make Any-night-of-the-week Avocado, Tofu, and Tomato
Salad with Yuzu Pepper Paste

Easiest Way to Make Any-night-of-the-week Avocado, Tofu, and Tomato Salad with Yuzu Pepper Paste

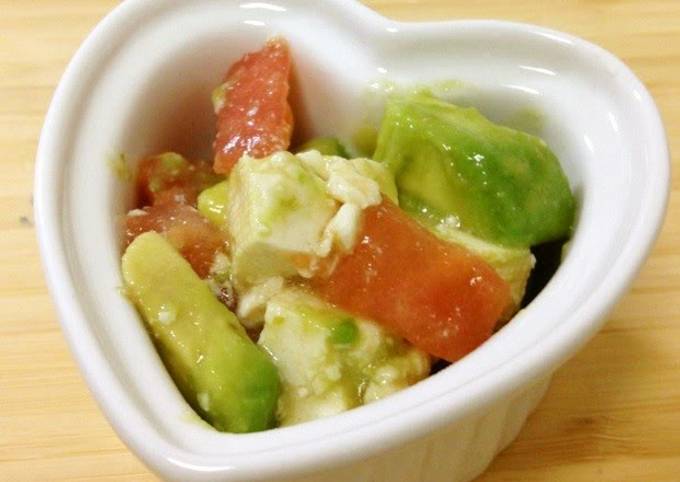
Avocado, Tofu, and Tomato Salad with Yuzu Pepper Paste.

Avocado, Tofu, and Tomato Salad with Yuzu Pepper Paste

Hello everybody, it is me again, Dan, welcome to my recipe page. Today, we're going to make a special dish, avocado, tofu, and tomato salad with yuzu pepper paste. It is one of my favorites. This time, I will make it a bit unique. This is gonna smell and look delicious.

Avocado, Tofu, and Tomato Salad with Yuzu Pepper Paste is one of the most favored of current trending meals on earth. It's appreciated by millions daily. It is easy, it is fast, it tastes yummy. Avocado, Tofu, and Tomato Salad with Yuzu Pepper Paste is something which I have loved my entire life. They're fine and they look wonderful.

To get started with this recipe, we have to first prepare a few components. You can cook avocado, tofu, and tomato salad with yuzu pepper paste using 7 ingredients and 7 steps. Here is how you cook it.

The ingredients needed to make Avocado, Tofu, and Tomato Salad with Yuzu Pepper Paste:

  1. {Prepare 1 of Avocado.
  2. {Make ready 1 of Tomato (medium).
  3. {Get 1/2 block of Tofu (firm).
  4. {Take 1 1/2 tbsp of Olive oil.
  5. {Make ready 1 of Salt.
  6. {Prepare 1 of Yuzu pepper paste.
  7. {Make ready 1 of from 1/2 a yuzu Yuzu juice※.

Instructions to make Avocado, Tofu, and Tomato Salad with Yuzu Pepper Paste:

  1. Cut the tofu on a chopping board and press with a weight to drain the water..
  2. Squeeze the yuzu (or lemon) juice into a bowl and dissolve the yuzu pepper paste..
  3. Dice the avocado into large pieces and add to the yuzu mixture..
  4. Dice the drained tofu into the same size as the avocado, and add to the bowl from Step 3..
  5. Immerse the tomato in hot water to make it easier to peel, remove the seeds and cut it into pieces about the same size as the avocado and tofu. Then, add it to the bowl from Step 4..
  6. Add olive oil and salt, mix, and it's done. Taste and adjust the saltiness as necessary..
  7. You can take it to parties. Here, I topped it with shiso leaf..

So that is going to wrap it up for this special food avocado, tofu, and tomato salad with yuzu pepper paste recipe. Thank you very much for reading. I am sure you will make this at home. There is gonna be interesting food at home recipes coming up. Remember to bookmark this page on your browser, and share it to your loved ones, colleague and friends. Thank you for reading. Go on get cooking!

Recipe of Super Quick Homemade Root Beer pork roast picnic

Recipe of Super Quick Homemade Root Beer pork roast picnic

Root Beer pork roast picnic.

Root Beer pork roast picnic

Hey everyone, it's John, welcome to my recipe site. Today, we're going to prepare a distinctive dish, root beer pork roast picnic. One of my favorites. For mine, I will make it a bit unique. This will be really delicious.

Root Beer pork roast picnic is one of the most well liked of current trending foods in the world. It is easy, it's fast, it tastes delicious. It's appreciated by millions every day. They are nice and they look fantastic. Root Beer pork roast picnic is something that I have loved my whole life.

To get started with this recipe, we must first prepare a few ingredients. You can have root beer pork roast picnic using 4 ingredients and 4 steps. Here is how you can achieve it.

The ingredients needed to make Root Beer pork roast picnic:

  1. {Make ready of pork picnic roast.
  2. {Make ready of root beer.
  3. {Take of Seasoning.
  4. {Take of Bbq.

Instructions to make Root Beer pork roast picnic:

  1. Add all ingredients to crock pot.
  2. Cook on high for 6 hours or until pulls apart..
  3. Add bbq sauce to finish it off and enjoy on a slider.
  4. Enjoy!!.

So that's going to wrap it up with this exceptional food root beer pork roast picnic recipe. Thanks so much for reading. I am sure that you will make this at home. There is gonna be interesting food in home recipes coming up. Remember to save this page in your browser, and share it to your loved ones, friends and colleague. Thanks again for reading. Go on get cooking!

Recipe of Homemade Honey brown sugar glazed ham

Recipe of Homemade Honey brown sugar glazed ham

Honey brown sugar glazed ham.

Honey brown sugar glazed ham

Hey everyone, hope you're having an amazing day today. Today, I'm gonna show you how to make a distinctive dish, honey brown sugar glazed ham. It is one of my favorites food recipes. This time, I am going to make it a bit tasty. This will be really delicious.

Honey brown sugar glazed ham is one of the most popular of current trending meals in the world. It's appreciated by millions daily. It is easy, it is quick, it tastes delicious. They're fine and they look wonderful. Honey brown sugar glazed ham is something that I have loved my whole life.

To begin with this particular recipe, we have to first prepare a few ingredients. You can have honey brown sugar glazed ham using 7 ingredients and 5 steps. Here is how you can achieve it.

The ingredients needed to make Honey brown sugar glazed ham:

  1. {Make ready of bone-in spiral-cut ham, about 10 pounds.
  2. {Prepare of honey.
  3. {Take of firmly packed brown sugar.
  4. {Make ready of ground ginger.
  5. {Prepare of ground mustard.
  6. {Get of ground cinnamon.
  7. {Take of Worcestershire sauce.

Instructions to make Honey brown sugar glazed ham:

  1. Preheat oven to 325°F. Place the ham on its side in roasting pan..
  2. Mix honey, brown sugar and spices in small bowl until well blended. If mixture is too thick, microwave on HIGH 30 seconds to 1 minute or until smooth, stirring after 30 seconds..
  3. Brush 1/2 of the honey mixture over ham, gently separating the slices so mixture can reach middle of ham. Cover loosely with foil..
  4. Bake 1 hour, basting occasionally with pan drippings..
  5. Remove foil. Brush with remaining honey mixture. Bake 45 minutes longer. Serve ham with pan drippings..

So that's going to wrap it up with this special food honey brown sugar glazed ham recipe. Thanks so much for your time. I am sure you can make this at home. There's gonna be more interesting food in home recipes coming up. Don't forget to bookmark this page in your browser, and share it to your loved ones, friends and colleague. Thank you for reading. Go on get cooking!

Easiest Way to Make Any-night-of-the-week Mini Oreo Cheese Cakes

Easiest Way to Make Any-night-of-the-week Mini Oreo Cheese Cakes

Mini Oreo Cheese Cakes.

Mini Oreo Cheese Cakes

Hello everybody, I hope you are having an incredible day today. Today, I'm gonna show you how to prepare a special dish, mini oreo cheese cakes. One of my favorites. For mine, I will make it a little bit unique. This is gonna smell and look delicious.

Mini Oreo Cheese Cakes is one of the most well liked of recent trending foods on earth. It is appreciated by millions every day. It's simple, it's quick, it tastes delicious. Mini Oreo Cheese Cakes is something which I have loved my entire life. They are fine and they look fantastic.

To get started with this particular recipe, we have to prepare a few components. You can cook mini oreo cheese cakes using 10 ingredients and 15 steps. Here is how you can achieve it.

The ingredients needed to make Mini Oreo Cheese Cakes:

  1. {Take of Cookie crust.
  2. {Make ready of Oreo cookie crumbs- about 10 cookies –crushed fine.
  3. {Take of brown sugar.
  4. {Prepare of butter -- melted.
  5. {Take of Cheese Cake Batter.
  6. {Get of cream cheese -- softened.
  7. {Take of sugar.
  8. {Get of each eggs.
  9. {Take of vanilla.
  10. {Take of cream (I have used sour cream or half and half and they come out great).

Steps to make Mini Oreo Cheese Cakes:

  1. Cookie crust.
  2. Mix the crumbs, brown sugar and melted butter together by hand in a bowl until well combined..
  3. Place a paper liner in the muffin cups and spray the inside of the paper liner with pan spray. (This will help the cheese cakes come losse from the liners after they cool).
  4. Place 1 1/2 tablespoons of the crumb mixture in to each muffin cup. If you have extra distribute it between the 18-20.
  5. With a 1/3 of a cup or a smaller measuring cup press and smooth the crumb mixture..
  6. An alternative is place Half an Oreo on the bottom of each and have an upside down Mimi Cheese cake it looks cool and taste great..
  7. Cheese cake batter.
  8. Cream the cream cheese, cream and sugar together in a mixer on high speed until smooth about 2 minutes. scrape the bowl and mix for one more minute..
  9. Next Add the eggs and vanilla gradually with the mixer on.Stop, drop and scrape bowl after each addition. (NO LUMPS).
  10. Be careful not to beat a lot of air into the cheesecake batter..
  11. With a portion scoop or a tablespoonu fill each of the cups about 80 %. If you have extra distribute it between the 18-20.
  12. Bake in 300F oven until the cheesecake is set. It should Jiggles like Jell-O and have a very slight hint of brown (about 20-25 minutes depending on the oven).
  13. Allow to cool to room temperature. Cover and refrigerate until full cooled overnight. (*Note these freeze well, I make them a week ahead for events and they taste great).
  14. We use a variety of topping or even thin sliced fresh fruit and brushed on melted apricot preserves or glaze..
  15. They are about 144 calories each if you make 20..

So that is going to wrap this up for this exceptional food mini oreo cheese cakes recipe. Thank you very much for reading. I am confident you will make this at home. There's gonna be more interesting food at home recipes coming up. Don't forget to save this page on your browser, and share it to your loved ones, colleague and friends. Thank you for reading. Go on get cooking!

Recipe of Favorite Tex's Pan-Fried Corned Beef Reuben 🐮🍞

Recipe of Favorite Tex's Pan-Fried Corned Beef Reuben 🐮🍞

Tex's Pan-Fried Corned Beef Reuben 🐮🍞.

Tex's Pan-Fried Corned Beef Reuben 🐮🍞

Hey everyone, it is Drew, welcome to our recipe page. Today, I will show you a way to make a distinctive dish, tex's pan-fried corned beef reuben 🐮🍞. It is one of my favorites food recipes. This time, I am going to make it a little bit tasty. This is gonna smell and look delicious.

Tex's Pan-Fried Corned Beef Reuben 🐮🍞 is one of the most favored of recent trending foods in the world. It is easy, it is fast, it tastes delicious. It's appreciated by millions daily. Tex's Pan-Fried Corned Beef Reuben 🐮🍞 is something which I have loved my entire life. They are nice and they look wonderful.

To begin with this recipe, we must prepare a few ingredients. You can have tex's pan-fried corned beef reuben 🐮🍞 using 7 ingredients and 7 steps. Here is how you can achieve that.

The ingredients needed to make Tex's Pan-Fried Corned Beef Reuben 🐮🍞:

  1. {Make ready 2 slice of rye bread.
  2. {Get 135 grams of corned beef (sliced).
  3. {Take of sauerkraut.
  4. {Get of Russian dressing, Thousand Island, or horseradish.
  5. {Make ready 2 slice of cheese (preferably Swiss).
  6. {Prepare 1 tbsp of groundnut, rapeseed, or vegetable oil.
  7. {Get of salt & pepper to season.

Instructions to make Tex's Pan-Fried Corned Beef Reuben 🐮🍞:

  1. Add the oil to the pan and swirl until it coats the entire bottom of the skillet. Bring to a high heat and toast one side of each slice of bread.
  2. Remove the bread from the pan, reduce heat to low and cook the corned beef and sauerkraut for 2-3 minutes https://cookpad.com/us/recipes/416527-texs-small-batch-sauerkraut.
  3. Pile the corned beef one the toasted side of one slice of bread, and return to the pan un-toasted side down. Increase the heat to medium.
  4. Add the sauerkraut on top of the corned beef, then drizzle with mustard or ketchup.
  5. Add the cheese.
  6. Then add the lid, un-toasted side to the outside again, then flip with a turner/spatula.
  7. Toast for about 3-4 minutes. Slice and serve.

So that's going to wrap it up for this exceptional food tex's pan-fried corned beef reuben 🐮🍞 recipe. Thank you very much for reading. I'm confident you can make this at home. There is gonna be interesting food in home recipes coming up. Don't forget to bookmark this page on your browser, and share it to your loved ones, colleague and friends. Thanks again for reading. Go on get cooking!

Recipe of Ultimate Agua Fresca (Infused Water)

Recipe of Ultimate Agua Fresca (Infused Water)

Agua Fresca (Infused Water).

Agua Fresca (Infused Water)

Hello everybody, hope you're having an amazing day today. Today, we're going to make a distinctive dish, agua fresca (infused water). It is one of my favorites food recipes. This time, I'm gonna make it a little bit tasty. This is gonna smell and look delicious.

Agua Fresca (Infused Water) is one of the most favored of current trending foods in the world. It's appreciated by millions daily. It is simple, it's quick, it tastes yummy. They're nice and they look wonderful. Agua Fresca (Infused Water) is something that I've loved my entire life.

To get started with this recipe, we must prepare a few components. You can have agua fresca (infused water) using 4 ingredients and 2 steps. Here is how you cook that.

The ingredients needed to make Agua Fresca (Infused Water):

  1. {Make ready of cubed watermelon.
  2. {Prepare of water.
  3. {Take of mint leaves.
  4. {Make ready of Lemon juice.

Steps to make Agua Fresca (Infused Water):

  1. Place ingredients in a blender and process until liquified.
  2. Strain and add ice to cool..

So that's going to wrap it up for this special food agua fresca (infused water) recipe. Thanks so much for your time. I'm confident you will make this at home. There's gonna be more interesting food in home recipes coming up. Remember to bookmark this page in your browser, and share it to your family, friends and colleague. Thanks again for reading. Go on get cooking!

How to Prepare Favorite Egg Sandwich Spread

How to Prepare Favorite Egg Sandwich Spread

Egg Sandwich Spread.

Egg Sandwich Spread

Hey everyone, hope you're having an incredible day today. Today, I'm gonna show you how to make a special dish, egg sandwich spread. One of my favorites. For mine, I will make it a little bit tasty. This will be really delicious.

Egg Sandwich Spread is one of the most popular of current trending foods in the world. It is appreciated by millions daily. It is easy, it's quick, it tastes delicious. Egg Sandwich Spread is something which I've loved my entire life. They are fine and they look wonderful.

To get started with this particular recipe, we must first prepare a few ingredients. You can cook egg sandwich spread using 5 ingredients and 3 steps. Here is how you cook it.

The ingredients needed to make Egg Sandwich Spread:

  1. {Prepare of eggs or as desired.
  2. {Take of pimiento.
  3. {Get of condensed milk.
  4. {Get of cheese.
  5. {Make ready of pineapple tidbits.

Instructions to make Egg Sandwich Spread:

  1. Boil eggs. While boiling, prepare other ingredients..
  2. Peel off pimiento's skin. Then slice into smallest cubes..
  3. Grate boiled eggs and cheese. Add sliced pimientos. Add condensed milk and sliced pineapples. Add a pinch of salt if desired..

So that's going to wrap this up for this exceptional food egg sandwich spread recipe. Thank you very much for your time. I'm sure that you will make this at home. There is gonna be interesting food in home recipes coming up. Don't forget to bookmark this page on your browser, and share it to your family, friends and colleague. Thank you for reading. Go on get cooking!

Steps to Make Any-night-of-the-week Beijing hot pot

Steps to Make Any-night-of-the-week Beijing hot pot

Beijing hot pot.

Beijing hot pot

Hello everybody, I hope you are having an incredible day today. Today, I will show you a way to prepare a distinctive dish, beijing hot pot. It is one of my favorites food recipes. For mine, I will make it a bit unique. This will be really delicious.

Beijing hot pot is one of the most popular of current trending meals in the world. It's appreciated by millions daily. It's simple, it is fast, it tastes delicious. Beijing hot pot is something which I have loved my entire life. They are fine and they look wonderful.

To begin with this particular recipe, we must prepare a few components. You can have beijing hot pot using 21 ingredients and 5 steps. Here is how you can achieve that.

The ingredients needed to make Beijing hot pot:

  1. {Take 2 of chicken carcasses.
  2. {Take 400 g of beef bones.
  3. {Get 2.5 L of water.
  4. {Make ready 2 tbsp of goji berries.
  5. {Prepare 20 of red dates.
  6. {Make ready of Salt (to taste).
  7. {Make ready of choice or combination of:.
  8. {Prepare of Beef or chicken (thinly sliced).
  9. {Prepare of Fish fillets (thinly sliced).
  10. {Take of Prawns, squids or scallops.
  11. {Prepare of Meatballs, crab sticks, fish balls or fish cakes.
  12. {Take of Dumplings or wontons.
  13. {Make ready of Tofu, bean curd skins, mushrooms, eggs.
  14. {Take of Vermicelli noodles, glass noodles or egg noodles.
  15. {Take of Bok choy, Chinese broccoli, wombok, garland chrysanthemum.
  16. {Get of condiments or dipping sauces:.
  17. {Take of Soy sauce.
  18. {Make ready of Fresh chillies.
  19. {Get of Garlic chilli sauce.
  20. {Take of Sesame oil.
  21. {Make ready of Chilli sauce.

Steps to make Beijing hot pot:

  1. Prepare a big pot and bring water to a boil. Boil the chicken carcass and beef bones for 5 mins and discard the water. This is to remove scum..
  2. Fill in 2.5L of water into the pot and bring it to boil. Add in goji berries and red dates, simmer for 2 hrs. Season with salt according to taste..
  3. Once ready, transfer broth into a steamboat pot / hot pot, about half full. Place it on a portable electric stove. Add in your own combination of meat, veggies and fish. Let it boil and cook. When ready, dish out into individual serving bowls with small wire strainer or ladle. Dip cooked food into condiments and enjoy..
  4. Repeat the same process by adding in meat, veggies and fish into the hot pot and allow to boil and cook once the first batch of cooked food has been distributed. Top up with broth when needed..
  5. Noodles and eggs are usually added towards the end when the broth is most flavourful after cooking all the ingredients..

So that is going to wrap it up for this exceptional food beijing hot pot recipe. Thank you very much for reading. I am sure you can make this at home. There's gonna be more interesting food in home recipes coming up. Remember to save this page on your browser, and share it to your family, friends and colleague. Thanks again for reading. Go on get cooking!

Step-by-Step Guide to Make Any-night-of-the-week Slow cooker pulled pork

Step-by-Step Guide to Make Any-night-of-the-week Slow cooker pulled pork

Slow cooker pulled pork.

Slow cooker pulled pork

Hello everybody, I hope you are having an incredible day today. Today, I'm gonna show you how to prepare a distinctive dish, slow cooker pulled pork. It is one of my favorites food recipes. For mine, I'm gonna make it a little bit unique. This will be really delicious.

Slow cooker pulled pork is one of the most well liked of current trending meals on earth. It is easy, it's fast, it tastes delicious. It's enjoyed by millions daily. Slow cooker pulled pork is something that I have loved my whole life. They're fine and they look wonderful.

To get started with this recipe, we have to first prepare a few components. You can cook slow cooker pulled pork using 5 ingredients and 5 steps. Here is how you can achieve it.

The ingredients needed to make Slow cooker pulled pork:

  1. {Prepare of 2-4 pound pork roast or beef roast.
  2. {Prepare of onion.
  3. {Take of of mild/med/hot salsa (salsa verde works perfect also).
  4. {Take of Salt and pepper is optional. Be careful if u add salt as the salsa contains plenty already!.
  5. {Prepare of Chopped bell peppers is also optional.

Instructions to make Slow cooker pulled pork:

  1. Chop onion and place in the slow cooker.
  2. Add meat.
  3. Pour salsa over the meat, cover with lid and cook on low for 8-10 hours..
  4. Shred and enjoy on tacos, burritos, salads, burgers etc..
  5. If u have leftovers, use in enchiladas!.

So that is going to wrap it up with this special food slow cooker pulled pork recipe. Thank you very much for your time. I am sure that you can make this at home. There is gonna be more interesting food at home recipes coming up. Remember to bookmark this page on your browser, and share it to your family, friends and colleague. Thanks again for reading. Go on get cooking!

Steps to Make Award-winning Linguini florentine with cheese

Steps to Make Award-winning Linguini florentine with cheese

Linguini florentine with cheese. Mixing the cheese with the sautéed spinach gets a jump-start on its melting. In the world of cooking, dishes labeled "Florentine" almost always feature spinach, so it's no surprise that that's the calling card of this classic omelette. To round out all those healthy green leaves is a generous amount of melted.

Linguini florentine with cheese Add milk until desired consistency is achieved. This is The Bald Chef's favorite Italian recipe Linguini With Red Clam Sauce. Vongole con Linguini is a classic recipe made with a marinara sauce infused.

Hello everybody, I hope you are having an amazing day today. Today, I will show you a way to make a special dish, linguini florentine with cheese. It is one of my favorites food recipes. For mine, I'm gonna make it a little bit tasty. This will be really delicious.

Mixing the cheese with the sautéed spinach gets a jump-start on its melting. In the world of cooking, dishes labeled "Florentine" almost always feature spinach, so it's no surprise that that's the calling card of this classic omelette. To round out all those healthy green leaves is a generous amount of melted.

Linguini florentine with cheese is one of the most favored of current trending foods in the world. It's easy, it's quick, it tastes yummy. It is appreciated by millions daily. Linguini florentine with cheese is something which I have loved my entire life. They're nice and they look fantastic.

To get started with this particular recipe, we have to prepare a few components. You can cook linguini florentine with cheese using 13 ingredients and 6 steps. Here is how you can achieve that.

The ingredients needed to make Linguini florentine with cheese:

  1. {Prepare of fresh mushrooms.
  2. {Prepare of garlic clove.
  3. {Make ready of onion.
  4. {Prepare of frozen spinach or have bag fresh.
  5. {Take of oregano.
  6. {Take of italian seasoning.
  7. {Take of low sodium tomato sauce.
  8. {Make ready of can chopped tomatoes.
  9. {Make ready of ricotta cheese.
  10. {Prepare of fat free mozzarella cheese.
  11. {Prepare of olive oil.
  12. {Prepare of cooked pasta.
  13. {Make ready of parmesan cheese.

Cook linguini as directed on box. While noodles cook heat butter and garlic in small saucepan over medium heat until butter is melted and garlic is Add cream and heat until bubbling. Add cheese, parsley, basil, salt and pepper. Try Ina Garten's Linguine with Shrimp Scampi recipe from Food Network: It's loaded with garlicky shrimp, lemon and red pepper flakes for warmth.

Instructions to make Linguini florentine with cheese:

  1. heat oven to 350°F spray non stick pan with butter flavored pam.
  2. in a nonstick skillet cook all vegetables in olive oil.
  3. Mix in cheeses and tomatoes.
  4. move to non- casserole and put in oven for 10 minutes.
  5. top with mozzarella and grated parmesan cheese.
  6. serve with fruit of choice and salad.

Download Cheese linguini stock photos at the best stock photography agency with millions of premium high quality, royalty-free stock photos, images and pictures at reasonable prices..linguini Chicken Florentine Roulade stuffed with spinach and cheese, served with linguini and cream sauce Garlic Mozzarella Chicken with house made Alfredo sauce and farfalle pasta Grilled Chicken in a delicate lemon wine sauce, served with linguine pasta Chicken Cacciatore oven-braised. Florentine cheese is a chewy, creamy cheese that slices well. I always hand out a "make sheet" like a professional cheese maker would use and encourage folks to. Eggs Florentine made easy in this recipe for the classic breakfast or brunch dish. Make the hollandaise in advance and the rest is so quick.

So that is going to wrap this up for this special food linguini florentine with cheese recipe. Thanks so much for your time. I am sure that you will make this at home. There's gonna be more interesting food at home recipes coming up. Remember to bookmark this page on your browser, and share it to your loved ones, colleague and friends. Thanks again for reading. Go on get cooking!

Simple Way to Prepare Quick Grilled Salmon with Herbs Gravy and mixed
veggies

Simple Way to Prepare Quick Grilled Salmon with Herbs Gravy and mixed veggies

Grilled Salmon with Herbs Gravy and mixed veggies.

Grilled Salmon with Herbs Gravy and mixed veggies

Hello everybody, it is Brad, welcome to my recipe page. Today, we're going to prepare a distinctive dish, grilled salmon with herbs gravy and mixed veggies. It is one of my favorites. For mine, I am going to make it a bit unique. This will be really delicious.

Grilled Salmon with Herbs Gravy and mixed veggies is one of the most favored of recent trending meals in the world. It's enjoyed by millions every day. It's simple, it's quick, it tastes delicious. They are fine and they look wonderful. Grilled Salmon with Herbs Gravy and mixed veggies is something that I've loved my whole life.

To get started with this recipe, we have to prepare a few ingredients. You can have grilled salmon with herbs gravy and mixed veggies using 15 ingredients and 5 steps. Here is how you can achieve that.

The ingredients needed to make Grilled Salmon with Herbs Gravy and mixed veggies:

  1. {Take 600 gr of salmon fillet.
  2. {Get to taste of Salt.
  3. {Make ready to taste of Ground white pepper.
  4. {Take 3 of potatoes cut into medium cubes.
  5. {Prepare 2 of carrots cut into few big pieces.
  6. {Get 20 gr of French beans, both ends removed.
  7. {Get 1/2 teaspoon of dry parsley.
  8. {Get 1/2 teaspoon of garlic salt.
  9. {Take 1 tablespoon of Olive oil.
  10. {Get of For the herb gravy:.
  11. {Make ready 1 cup of beef stock.
  12. {Get 1/2 teaspoon of Italian herbs.
  13. {Make ready 1 tablespoon of flour.
  14. {Get to taste of Salt and pepper.
  15. {Take 1 tablespoon of Olive oil.

Instructions to make Grilled Salmon with Herbs Gravy and mixed veggies:

  1. Season the salmon with salt and pepper..
  2. Steam the veggies together (except French beans) until it soft. Put aside and let it cool. Preheat the frying pan with olive oil and sauté all the veggies. Sprinkle with garlic salt and dry parsley. Sauté around 1 mins..
  3. For the fish: Preheat grill for medium heat. Lightly oil the grill with olive oil. Put the salmon into the grill and cook each side around 5 mins or until the fish flakes easily..
  4. For the gravy: Place the saucepan into medium heat. Lightly oil with olive oil. Sprinkle the flour into the saucepan and combine use a whisk. Cook about 1 minute until turn into lump. Slowly pour 1/2 cup of beef stock and continue whisking until the flour combine evenly into the liquid. As soon as it thickens, add another 1/2 cup of beef stock while whisking. Then add the Italian herbs, salt and pepper. Simmer around 1 min and put aside..
  5. Preparation: Put the grilled salmon and veggies into the plate. Then pour the gravy into the salmon. And it's ready to serve..

So that is going to wrap it up for this special food grilled salmon with herbs gravy and mixed veggies recipe. Thanks so much for your time. I am confident that you will make this at home. There's gonna be interesting food at home recipes coming up. Remember to bookmark this page in your browser, and share it to your loved ones, colleague and friends. Thanks again for reading. Go on get cooking!

Recipe of Ultimate Amore per il Mare (Pasta di Pesci).....Love of the
Ocean (Pasta

Recipe of Ultimate Amore per il Mare (Pasta di Pesci).....Love of the Ocean (Pasta

Amore per il Mare (Pasta di Pesci).....Love of the Ocean (Pasta.

Amore per il Mare (Pasta di Pesci).....Love of the Ocean (Pasta

Hello everybody, I hope you're having an amazing day today. Today, we're going to make a distinctive dish, amore per il mare (pasta di pesci).....love of the ocean (pasta. One of my favorites food recipes. This time, I will make it a bit tasty. This is gonna smell and look delicious.

Amore per il Mare (Pasta di Pesci).....Love of the Ocean (Pasta is one of the most popular of recent trending foods on earth. It is appreciated by millions daily. It's easy, it is fast, it tastes delicious. They're fine and they look wonderful. Amore per il Mare (Pasta di Pesci).....Love of the Ocean (Pasta is something which I have loved my whole life.

To get started with this particular recipe, we have to prepare a few ingredients. You can have amore per il mare (pasta di pesci).....love of the ocean (pasta using 15 ingredients and 6 steps. Here is how you cook it.

The ingredients needed to make Amore per il Mare (Pasta di Pesci).....Love of the Ocean (Pasta:

  1. {Take of little neck clams.
  2. {Get of jumbo shrimp.
  3. {Take of large scallops.
  4. {Get of cod fillet.
  5. {Make ready of linguine pasta.
  6. {Take of pino grigio white wine.
  7. {Take of garlic.
  8. {Make ready of plum tomatoes.
  9. {Make ready of fresh basil.
  10. {Prepare of fresh parsley.
  11. {Take of lemons.
  12. {Prepare of olive oil.
  13. {Make ready of butter.
  14. {Make ready of salt & pepper.
  15. {Take of crushed red pepper.

Steps to make Amore per il Mare (Pasta di Pesci).....Love of the Ocean (Pasta:

  1. In a pan add lil olive oil & butter on medium heat & cook salt & peppered scallops & cod fish & set aside.
  2. In a separate pot add olive oil on medium heat & cook sliced garlic until clear. Add white wine & clams diced tomatoes & cook until wine is reduced & clams open. Take clams out of the pot & set aside..
  3. In a separate pot boil & salt water & cook pasta until aldente. Drain pasta & put back in the pot with some of the broth & mix to keep pasta from sticking..
  4. Add shrimp, scallops & fish to the broth with half of the juliened basil & chopped parsley. Once the shrimp are cooked add back the clams..
  5. In a large serving platter, plate the linguine & pour over the seafood & sauce & garnish with the remaining basil & parsley & sprinkle on a lil crushed red pepper..
  6. Eat & enjoy.

So that's going to wrap this up with this special food amore per il mare (pasta di pesci).....love of the ocean (pasta recipe. Thank you very much for your time. I am confident you will make this at home. There's gonna be more interesting food in home recipes coming up. Don't forget to bookmark this page on your browser, and share it to your family, colleague and friends. Thank you for reading. Go on get cooking!

Step-by-Step Guide to Prepare Homemade spaghetti mix

Step-by-Step Guide to Prepare Homemade spaghetti mix

spaghetti mix.

spaghetti mix

Hey everyone, it's Jim, welcome to my recipe site. Today, I'm gonna show you how to prepare a special dish, spaghetti mix. One of my favorites food recipes. For mine, I will make it a bit unique. This is gonna smell and look delicious.

spaghetti mix is one of the most favored of current trending meals on earth. It is simple, it's quick, it tastes delicious. It's enjoyed by millions every day. spaghetti mix is something which I have loved my entire life. They're fine and they look fantastic.

To get started with this recipe, we have to first prepare a few components. You can have spaghetti mix using 6 ingredients and 6 steps. Here is how you can achieve that.

The ingredients needed to make spaghetti mix:

  1. {Take of Chicken breast.
  2. {Get of Linguine pasta.
  3. {Prepare of Carrots.
  4. {Take of cilantro.
  5. {Make ready of Spaghetti sauce.
  6. {Prepare of Butter.

Instructions to make spaghetti mix:

  1. heat pan and begin melting butter, chop up chicken beat(cubes) and then place in pan to cook. Mix occasionaly..
  2. While the chicken cosa prep the pan with water for the pasta, then put in the pasta..
  3. begin chopping up vegetables,(I used cartotts and broccoli,optional). Once that's done mix them in with the chicken..
  4. once the pasta is ready, dump water out and mix pasta with chicken..
  5. Then the final step will be to add the can of spaghetti sauce and continue mixing on a medium - high heat until ready. (optional: add spices, I used 2 teaspoons of caldo con sabor de pollo, black pepper & others.).
  6. Be creative! (:.

So that is going to wrap it up with this exceptional food spaghetti mix recipe. Thanks so much for your time. I'm confident that you will make this at home. There's gonna be interesting food at home recipes coming up. Don't forget to save this page on your browser, and share it to your family, friends and colleague. Thank you for reading. Go on get cooking!

Easiest Way to Make Homemade Foxtail millet dosa

Easiest Way to Make Homemade Foxtail millet dosa

Foxtail millet dosa. Serve the Foxtail Millet Podi Dosa along with Bottle Gourd Peel Chutney Recipe for breakfast or even make it for a tea party or a weeknight dinner. Foxtail Millet Dosa is highly nutritious and crispy for the kids to resist. These baby friendly millets are a good way to introduce varieties to babies and.

Foxtail millet dosa Foxtail Millet Dosa recipe gives you the best of both worlds, and is sure to become your new favorite dish. Prepared using just a few ingredients, this recipe will give you a run for your money. Foxtail millet dosa has become so very common breakfast at my home now that I don't even notice The porous texture, softness and the taste resemble very much like plain dosa with bonus health.

Hey everyone, hope you're having an incredible day today. Today, we're going to prepare a special dish, foxtail millet dosa. It is one of my favorites food recipes. For mine, I am going to make it a little bit tasty. This is gonna smell and look delicious.

Serve the Foxtail Millet Podi Dosa along with Bottle Gourd Peel Chutney Recipe for breakfast or even make it for a tea party or a weeknight dinner. Foxtail Millet Dosa is highly nutritious and crispy for the kids to resist. These baby friendly millets are a good way to introduce varieties to babies and.

Foxtail millet dosa is one of the most favored of recent trending meals in the world. It's easy, it's fast, it tastes delicious. It's appreciated by millions every day. Foxtail millet dosa is something that I have loved my whole life. They're nice and they look fantastic.

To begin with this particular recipe, we have to prepare a few components. You can have foxtail millet dosa using 6 ingredients and 7 steps. Here is how you can achieve that.

The ingredients needed to make Foxtail millet dosa:

  1. {Take of foxtail millet.
  2. {Get of urad dhuli daal.
  3. {Prepare of poha.
  4. {Take of methi daana.
  5. {Prepare of salt.
  6. {Prepare of oil.

How to make Foxtail Millet Dosa. Foxtail Millet Dosa is healthy nutritious and delicious dosas. Millets are high on fibre and satiate hunger quickly preventing from overeating. This recipe for Foxtail Millet dosa or Thinai dosa is made with foxtail rice and a small quantity of red rice.

Steps to make Foxtail millet dosa:

  1. Wash and soak millet overnite.
  2. Wash and soak urad dal and methidana overnite.
  3. Soak poha for 1/2 an hr.
  4. Grind all three separately with cold water.
  5. Mix all three and salt and leave covered to ferment in a big vessel (batter raises so there should be space for that) for at least 8 hrs.
  6. Heat up dosa tawa, grease with oil sprinkle drops of water and cook healthy dosas on medium flame.
  7. Serve with sambhar or chutney or make masala dosa and enjoy.

See recipes for Sprouted Foxtail millet/Thinai laddu too. Methods: The GI of rice dosa and foxtail millet dosa was estimated. The participants were on oral hypoglycaemic agents (OHA). Foxtail millet is adapted to well-drained soils. Foxtail millet is an annual grass whose plants reach Foxtail millet was first naturalized in China.

So that is going to wrap this up for this exceptional food foxtail millet dosa recipe. Thank you very much for reading. I am sure that you can make this at home. There's gonna be interesting food in home recipes coming up. Don't forget to save this page in your browser, and share it to your family, friends and colleague. Thank you for reading. Go on get cooking!

Step-by-Step Guide to Make Perfect Buffalo chicken spread

Step-by-Step Guide to Make Perfect Buffalo chicken spread

Buffalo chicken spread.

Buffalo chicken spread

Hello everybody, it's Louise, welcome to my recipe page. Today, I will show you a way to make a special dish, buffalo chicken spread. It is one of my favorites. For mine, I will make it a little bit unique. This is gonna smell and look delicious.

Buffalo chicken spread is one of the most favored of current trending meals in the world. It's simple, it's fast, it tastes yummy. It's appreciated by millions every day. They are nice and they look wonderful. Buffalo chicken spread is something that I've loved my whole life.

To begin with this particular recipe, we must prepare a few components. You can have buffalo chicken spread using 5 ingredients and 6 steps. Here is how you can achieve it.

The ingredients needed to make Buffalo chicken spread:

  1. {Get of cream cheese (softened).
  2. {Make ready of ranch seasoning pkg.
  3. {Get of large chicken breast, cooked and shredded or can use canned chicken.
  4. {Get of Buffalo sauce, quantity depends on how much spice you want.
  5. {Get of cheddar cheese.

Instructions to make Buffalo chicken spread:

  1. Mix cream cheese & ranch packet together. Spread onto a cookie sheet..
  2. Put shredded chicken on top of cream cheese..
  3. Drizzle buffalo sauce over chicken..
  4. Top with shredded cheddar cheese..
  5. Bake at 350' for about 10 mins or until cheese is melted..
  6. Eat with chips or spread on french bread. Enjoy!.

So that is going to wrap it up for this exceptional food buffalo chicken spread recipe. Thank you very much for reading. I am sure you will make this at home. There's gonna be more interesting food at home recipes coming up. Don't forget to bookmark this page on your browser, and share it to your loved ones, friends and colleague. Thank you for reading. Go on get cooking!

Steps to Make Homemade Black Bean and Corn Salsa Dip

Steps to Make Homemade Black Bean and Corn Salsa Dip

Black Bean and Corn Salsa Dip.

Black Bean and Corn Salsa Dip

Hello everybody, it is Drew, welcome to my recipe page. Today, I will show you a way to prepare a distinctive dish, black bean and corn salsa dip. One of my favorites food recipes. This time, I will make it a bit tasty. This will be really delicious.

Black Bean and Corn Salsa Dip is one of the most well liked of current trending meals in the world. It is appreciated by millions daily. It's easy, it is quick, it tastes yummy. They are fine and they look fantastic. Black Bean and Corn Salsa Dip is something that I have loved my whole life.

To get started with this particular recipe, we must first prepare a few ingredients. You can have black bean and corn salsa dip using 3 ingredients and 6 steps. Here is how you can achieve that.

The ingredients needed to make Black Bean and Corn Salsa Dip:

  1. {Make ready of of Black Bean and Corn Salsa (I prefer Tastefully Simple).
  2. {Make ready of Philadelphia Cream Cheese.
  3. {Get of Cheese. (I prefer 4 State Cheddar or Mexican Blend).

Steps to make Black Bean and Corn Salsa Dip:

  1. Preheat oven to 350..
  2. In 2 qt baking dish, spread package of cream cheese on bottom..
  3. Pour salsa over cream cheese..
  4. Cover salsa with desired amount of cheese (I typically use two cups)..
  5. Bake until cheese is melted and bubbly..
  6. Enjoy with favorite tortilla chips..

So that's going to wrap it up for this exceptional food black bean and corn salsa dip recipe. Thanks so much for your time. I'm confident that you will make this at home. There is gonna be interesting food in home recipes coming up. Remember to bookmark this page on your browser, and share it to your loved ones, colleague and friends. Thanks again for reading. Go on get cooking!

How to Make Quick “Coffee infused Rasgulla crumbs with pistachio ice
cream and coffee syrup”

How to Make Quick “Coffee infused Rasgulla crumbs with pistachio ice cream and coffee syrup”

“Coffee infused Rasgulla crumbs with pistachio ice cream and coffee syrup”.

“Coffee infused Rasgulla crumbs with pistachio ice cream and coffee syrup”

Hey everyone, it is me again, Dan, welcome to my recipe page. Today, I'm gonna show you how to prepare a special dish, “coffee infused rasgulla crumbs with pistachio ice cream and coffee syrup”. It is one of my favorites food recipes. For mine, I will make it a bit unique. This will be really delicious.

“Coffee infused Rasgulla crumbs with pistachio ice cream and coffee syrup” is one of the most popular of recent trending foods on earth. It's appreciated by millions every day. It is simple, it is quick, it tastes delicious. “Coffee infused Rasgulla crumbs with pistachio ice cream and coffee syrup” is something which I've loved my entire life. They're fine and they look fantastic.

To begin with this recipe, we have to first prepare a few components. You can have “coffee infused rasgulla crumbs with pistachio ice cream and coffee syrup” using 7 ingredients and 5 steps. Here is how you can achieve it.

The ingredients needed to make “Coffee infused Rasgulla crumbs with pistachio ice cream and coffee syrup”:

  1. {Take of fresh thick Milk.
  2. {Make ready of Lemon juice/ vinegar.
  3. {Take of Water as required.
  4. {Prepare of Instant coffee powder.
  5. {Take of Vanilla essence.
  6. {Get of quenelle Pistachio Ice-cream.
  7. {Prepare of castor sugar.

Instructions to make “Coffee infused Rasgulla crumbs with pistachio ice cream and coffee syrup”:

  1. TO MAKE RASGULLAS : In a heavy bottomed pan, add in full fat whole milk and bring to a boil. While add in lemon juice and stir well. Drain and keep the chenna aside.now take the chenna and knead it until soft and till it reduces the oily substances to your palm and put a possible force. Now make a small balls from chenna mixture and keep aside..
  2. TO MAKE COFFEE SYRUP: In a heavy bottomed saucepan add in sugar, water and instant coffee powder. Stir in well. Let the coffee syrup come up to a boil and them simmer for 10- 15 minutes. Transfer it a bowl and add in vanilla essence for flavor, let it cool and,u notice the thickening of Coffee syrup..
  3. TO MAKE COFFEE INFUSED RASGULLA : (Making the Coffee based sugar syrup) Add sugar and water to a wide pot. Add in instant coffee powder and bring it a boil. Now add in prepared rasgullas balls gently and cover the lid.Cook for about 10 mins (by simmering).
  4. Remove the Rasgullas from the coffee based syrup, make the crumbs of Rasgullas and transfer them on the above prepared Coffee Syrup and let it sit for a while till it gets soaked..
  5. PLATING AND PRESENTATION/ASSEMBLING: Place the coffee infused rasgulla crumbs in a plate, top it with a quenelle of ice cream. And Drizzle over thick Instant Thick Coffee Syrup. Grab a spoon and it's time to dig in.......!!.

So that is going to wrap this up for this exceptional food “coffee infused rasgulla crumbs with pistachio ice cream and coffee syrup” recipe. Thanks so much for reading. I am confident that you can make this at home. There is gonna be interesting food in home recipes coming up. Don't forget to save this page in your browser, and share it to your loved ones, colleague and friends. Thanks again for reading. Go on get cooking!

Recipe of Favorite 2 Glugs of RWV in a Sauce over Linguine

Recipe of Favorite 2 Glugs of RWV in a Sauce over Linguine

2 Glugs of RWV in a Sauce over Linguine.

2 Glugs of RWV in a Sauce over Linguine

Hello everybody, hope you're having an incredible day today. Today, we're going to prepare a special dish, 2 glugs of rwv in a sauce over linguine. One of my favorites food recipes. This time, I'm gonna make it a little bit tasty. This will be really delicious.

2 Glugs of RWV in a Sauce over Linguine is one of the most popular of current trending foods on earth. It's appreciated by millions every day. It is simple, it is fast, it tastes delicious. 2 Glugs of RWV in a Sauce over Linguine is something that I've loved my entire life. They are fine and they look fantastic.

To begin with this recipe, we have to first prepare a few components. You can cook 2 glugs of rwv in a sauce over linguine using 25 ingredients and 6 steps. Here is how you cook that.

The ingredients needed to make 2 Glugs of RWV in a Sauce over Linguine:

  1. {Take of Sauce--------------------.
  2. {Make ready of corn, frozen.
  3. {Prepare of butter.
  4. {Take of ground beef.
  5. {Prepare of chopped yellow bell pepper.
  6. {Prepare of dehydrated onions.
  7. {Take of ground turmeric.
  8. {Get of celery salt.
  9. {Make ready of kosher salt.
  10. {Take of can diced tomatoes.
  11. {Prepare of tomato sauce.
  12. {Get of minced garlic.
  13. {Take of chopped parsley.
  14. {Get of glugs of red wine vinegar.
  15. {Take of ground black pepper.
  16. {Prepare of Linguine----------------------.
  17. {Prepare of Linguine pasta.
  18. {Prepare of chopped parsley.
  19. {Prepare of butter.
  20. {Get of water.
  21. {Prepare of kosher salt.
  22. {Take of extra Virgin olive oil.
  23. {Take of Toppings------------------.
  24. {Prepare of fresh grated parmesan cheese.
  25. {Take of hot sauce optional.

Instructions to make 2 Glugs of RWV in a Sauce over Linguine:

  1. Boil the water with the kosher salt and oil. Add the Linguine..
  2. Brown the beef with the peppers, onions, garlic, kosher salt, celery salt, turmeric, and ground black pepper..
  3. Add the rest of the sauce ingredients when browned. Except the tomatoes, tomato paste, and tomato sauce..
  4. After simmering for 15 minutes, add the tomato sauce and diced tomatoes. Simmer 20 minutes add the tomato paste and stir in well. Simmer 20 minutes..
  5. When the Linguine is done drain all but 1/2 cup of pasta water. Add pasta water to the sauce. Add the butter and parsley to the Linguine. Toss well. Add the pasta to a plate top with the sauce. Add the cheese and hot sauce if you are using the hot sauce..
  6. Serve I hope you enjoy!!.

So that is going to wrap this up with this special food 2 glugs of rwv in a sauce over linguine recipe. Thank you very much for your time. I am confident you will make this at home. There is gonna be more interesting food in home recipes coming up. Don't forget to save this page in your browser, and share it to your loved ones, friends and colleague. Thanks again for reading. Go on get cooking!

Simple Way to Prepare Ultimate Cheeseburger stew

Simple Way to Prepare Ultimate Cheeseburger stew

Cheeseburger stew.

Cheeseburger stew

Hello everybody, hope you are having an incredible day today. Today, I will show you a way to prepare a special dish, cheeseburger stew. One of my favorites food recipes. This time, I'm gonna make it a bit tasty. This is gonna smell and look delicious.

Cheeseburger stew is one of the most favored of current trending meals on earth. It is simple, it is fast, it tastes yummy. It is appreciated by millions every day. Cheeseburger stew is something which I have loved my entire life. They are fine and they look wonderful.

To begin with this particular recipe, we must first prepare a few ingredients. You can cook cheeseburger stew using 11 ingredients and 4 steps. Here is how you cook that.

The ingredients needed to make Cheeseburger stew:

  1. {Make ready of ground sirloin.
  2. {Get of yellow prepared mustard.
  3. {Get of Heinz tomato ketchup.
  4. {Take of mayonnaise.
  5. {Make ready of onion diced.
  6. {Get of diced tomatoes if canned drained.
  7. {Take of sliced kosher pickle.
  8. {Get of extra sharp cheddar cheese, shredded.
  9. {Take of salt.
  10. {Make ready of ground black pepper.
  11. {Get of granulated garlic powder.

Steps to make Cheeseburger stew:

  1. Brown the ground sirloin with onions and kosher pickle slices..
  2. Add the mayonnaise, mustard, and ketchup.
  3. Add tomatoes let simmer 4 minutes add cheese. Cover and remove from heat let sit till cheese is melted..
  4. Serve hope you enjoy!.

So that's going to wrap it up for this special food cheeseburger stew recipe. Thank you very much for your time. I'm sure you can make this at home. There is gonna be interesting food in home recipes coming up. Remember to save this page in your browser, and share it to your family, friends and colleague. Thanks again for reading. Go on get cooking!

Simple Way to Prepare Ultimate Mint Chocolate Truffles

Simple Way to Prepare Ultimate Mint Chocolate Truffles

Mint Chocolate Truffles.

Mint Chocolate Truffles

Hello everybody, it's Jim, welcome to our recipe page. Today, we're going to prepare a special dish, mint chocolate truffles. It is one of my favorites food recipes. This time, I'm gonna make it a bit unique. This is gonna smell and look delicious.

Mint Chocolate Truffles is one of the most favored of recent trending foods in the world. It's easy, it is quick, it tastes yummy. It's enjoyed by millions daily. They're nice and they look wonderful. Mint Chocolate Truffles is something that I have loved my entire life.

To begin with this particular recipe, we must prepare a few components. You can cook mint chocolate truffles using 6 ingredients and 12 steps. Here is how you cook that.

The ingredients needed to make Mint Chocolate Truffles:

  1. {Take 230 grams of bittersweet to semisweet chocolate..
  2. {Take 30 grams of unsalted butter.
  3. {Prepare 120 ml of heavy cream/ double cream.
  4. {Get 1 3/4 tsp of peppermint extract.
  5. {Prepare 1 of Bowls of coating: Cocoa powder, rianbow sprinkles, desiccated coconuts, roasted finely chopped peanuts, tempered chocolate, e.t.c..
  6. {Get 1 tbsp of (varies) 1-3 tablespoon of honey.

Steps to make Mint Chocolate Truffles:

  1. Finely chop chocolate and place it in a bowl..
  2. Add cream to saucepan, together with small diced butter and honey and bring mixture just to a boil. Butter must be melted before the mixture boils, so dice ur butter or soften them before adding it to cream in saucepan..
  3. (Amount of honey added is dependent on the sweetness of your chocolate used and sweetness you want) I added 3 tablespoon of honey to a mixture of 72% cocoa and 65% cocoa..
  4. When mixture starts to boil, turn off heat and pour mixture to the chopped chocolate. Let them sit for a while and stir to ensure chocolate is fully melted. If the chocolate is not fully melted, place bowl on simmering water and stir till melt..
  5. Once chocolate is fully melted and mixture is well combined, add peppermint extract and mix well..
  6. (You may want to use real mint leaves in this recipe. In this, slightly bruise the mint leaves and add to the saucepan together with butter and honey and bring mixture just to a boil. Strain the mixture over chocolate to remove leaves.).
  7. Pour mixture into a shallow large dish or bowl or you can keep them in the same bowl and refrigerate till firm, approx 1-2 hours..
  8. Using a melon baller/small ice cream scoop/ hands, scoop mixture and make into balls. You may find it hard to work with your hands as it will melt and become sticky. The trick here is to use a melon baller or small ice cream scoop to ball the mixture and using a small small spatula, or teaspoon to scoop the chocolate out..
  9. (If you are living in hot and humid country like I do, you will need to fridge the mixture every few balls as the mixture will get too soft to work with).
  10. This can be kept in fridge for up to a week or freeze them for months. Enjoy! =).
  11. Place ball of truffles in a bowl of coatings and roll them to cover them completely. Lift them up gently and shake off the excess and place on a serving plate.. Its best eaten chilled..
  12. Makes ~30 truffle balls..

So that's going to wrap it up for this special food mint chocolate truffles recipe. Thanks so much for reading. I'm sure you can make this at home. There's gonna be more interesting food in home recipes coming up. Don't forget to bookmark this page in your browser, and share it to your loved ones, friends and colleague. Thank you for reading. Go on get cooking!

Recipe of Ultimate Vickys Very Berry Fruit Smoothie, GF DF EF SF NF

Recipe of Ultimate Vickys Very Berry Fruit Smoothie, GF DF EF SF NF

Vickys Very Berry Fruit Smoothie, GF DF EF SF NF.

Vickys Very Berry Fruit Smoothie, GF DF EF SF NF

Hey everyone, it's me again, Dan, welcome to my recipe page. Today, we're going to make a special dish, vickys very berry fruit smoothie, gf df ef sf nf. One of my favorites food recipes. This time, I'm gonna make it a bit tasty. This is gonna smell and look delicious.

Vickys Very Berry Fruit Smoothie, GF DF EF SF NF is one of the most popular of current trending foods on earth. It's simple, it is quick, it tastes delicious. It is enjoyed by millions every day. Vickys Very Berry Fruit Smoothie, GF DF EF SF NF is something that I've loved my entire life. They're nice and they look wonderful.

To get started with this recipe, we have to prepare a few ingredients. You can cook vickys very berry fruit smoothie, gf df ef sf nf using 6 ingredients and 1 steps. Here is how you cook it.

The ingredients needed to make Vickys Very Berry Fruit Smoothie, GF DF EF SF NF:

  1. {Take of banana, chopped into chunks and frozen overnight.
  2. {Prepare of raspberries.
  3. {Get of blueberries.
  4. {Make ready of light coconut milk or milk of choice.
  5. {Prepare of milled flaxseed.
  6. {Make ready of maple syrup or agave nectar.

Instructions to make Vickys Very Berry Fruit Smoothie, GF DF EF SF NF:

  1. Put all the ingredients into a blender and blend until smooth. Adjust the milk to your desired thickness. Pour into 2 glasses and enjoy!.

So that is going to wrap it up for this exceptional food vickys very berry fruit smoothie, gf df ef sf nf recipe. Thank you very much for your time. I'm sure that you will make this at home. There is gonna be more interesting food in home recipes coming up. Remember to save this page in your browser, and share it to your loved ones, friends and colleague. Thank you for reading. Go on get cooking!

Simple Way to Prepare Favorite I Love Liverwurst Spread

Simple Way to Prepare Favorite I Love Liverwurst Spread

I Love Liverwurst Spread.

I Love Liverwurst Spread

Hello everybody, it's me, Dave, welcome to my recipe page. Today, I'm gonna show you how to make a special dish, i love liverwurst spread. It is one of my favorites food recipes. For mine, I will make it a little bit unique. This will be really delicious.

I Love Liverwurst Spread is one of the most favored of recent trending meals in the world. It's enjoyed by millions daily. It is easy, it's quick, it tastes delicious. They are nice and they look wonderful. I Love Liverwurst Spread is something that I have loved my whole life.

To begin with this recipe, we have to prepare a few components. You can cook i love liverwurst spread using 11 ingredients and 4 steps. Here is how you can achieve it.

The ingredients needed to make I Love Liverwurst Spread:

  1. {Get 1/2 lb of liverwurst diced roughly.
  2. {Get 1/2 of medium onion roughly chopped.
  3. {Prepare 4 oz of softened cream cheese,cubed.
  4. {Get 2 tbsp of dijon mustard.
  5. {Take 2 tbsp of mayonnaise.
  6. {Prepare 2 tbsp of softened butter.
  7. {Make ready 1 tbsp of dried parsley.
  8. {Take 1 tsp of chopped garlic.
  9. {Take 1 tsp of seasoned salt.
  10. {Prepare 1/2 tsp of celery seed.
  11. {Make ready 1/2 tsp of ground black pepper.

Steps to make I Love Liverwurst Spread:

  1. In a food processor pulse the onions until they are diced small. Add liverwurst and process until its a pâté consistency..
  2. Add all other ingredients and continue to run processor until completely smooth..
  3. Transfer spread into your serving dish and refrigerate at LEAST 6 hrs. ( I make this two days before to allow all flavors to blend together.).
  4. Serve with crackers, cucumbers,celery,peppers and carrots. Or be a total glutton like myself and eat with a spoon.....;).

So that is going to wrap this up with this special food i love liverwurst spread recipe. Thanks so much for reading. I'm sure you can make this at home. There's gonna be interesting food at home recipes coming up. Remember to save this page on your browser, and share it to your family, colleague and friends. Thanks again for reading. Go on get cooking!

Steps to Make Homemade Coconut milk candy

Steps to Make Homemade Coconut milk candy

Coconut milk candy. Delight your taste buds with coconut milk candy from Alibaba.com. Delicious coconut milk candy of various flavor combinations, colors and sizes available at enticing price ranges. Coconut candy refer to various candies made with coconut or coconut flavorings.

Coconut milk candy Coconut truffles blend the mellow sweetness of white chocolate with the tropical flavor of shredded. Tips for Making Coconut Chocolate Candy. - If you're not into healthy or don't care for the flavor of honey, you can substitute out the honey with condensed milk instead. - You can use your microwave. Supercook clearly lists the ingredients each recipe uses, so you can find the perfect recipe quickly!

Hey everyone, I hope you're having an incredible day today. Today, I'm gonna show you how to prepare a distinctive dish, coconut milk candy. One of my favorites. This time, I will make it a little bit unique. This will be really delicious.

Delight your taste buds with coconut milk candy from Alibaba.com. Delicious coconut milk candy of various flavor combinations, colors and sizes available at enticing price ranges. Coconut candy refer to various candies made with coconut or coconut flavorings.

Coconut milk candy is one of the most well liked of current trending foods in the world. It is appreciated by millions every day. It's simple, it's fast, it tastes yummy. Coconut milk candy is something that I have loved my entire life. They're nice and they look wonderful.

To get started with this recipe, we must prepare a few ingredients. You can have coconut milk candy using 6 ingredients and 2 steps. Here is how you can achieve it.

The ingredients needed to make Coconut milk candy:

  1. {Get of Desiccated coconut.
  2. {Take 4 cups of powdered milk.
  3. {Prepare 1 cup of sugar.
  4. {Take 1 cup of water.
  5. {Get of Flavour.
  6. {Get of Vegetable oil.

See more ideas about coconut candy, coconut, food. Pastillas de Leche (Candied Milk) Here is another sweet concoction for the sugar lovers out there. Coconut Candy, a delightfully sweet and tasty treat that is sure to please. Make ahead and store in The dried coconut was able to clump together with just the condensed milk.

Steps to make Coconut milk candy:

  1. Put water in a pot and set on fire, add the sugar and allow it to boil until it melts completely, at this point add the coconut stir it after some times you bring it down from the flame and add the powdered milk, stir it very well till all the lumps are smooth..
  2. Get a clean polythene bag and spread on it a vegetable oil in order to avoid sticking, put the milk candy on the poly bag and cover with another poly bag, use your rolling pin to level the milk candy, now shape the way you like eai by using a knife or cookies cutter..

This time round, I used a. Creamy condensed milk is paired with coconut and rolled in cocoa for the ultimate sweet treat. Cocomels, makers of the original Coconut Milk Caramels. All our caramels are Made Without Dairy or Check out these Vegan Pretzel Bites made with @unrealcandy and our Coconut Milk Caramels. Add enough coconut milk to dissolve sugar.

So that is going to wrap this up with this special food coconut milk candy recipe. Thanks so much for reading. I'm sure that you can make this at home. There's gonna be interesting food in home recipes coming up. Remember to bookmark this page on your browser, and share it to your family, friends and colleague. Thank you for reading. Go on get cooking!

Easiest Way to Prepare Speedy Thick New York Style Cheesecake

Easiest Way to Prepare Speedy Thick New York Style Cheesecake

Thick New York Style Cheesecake.

Thick New York Style Cheesecake

Hello everybody, I hope you're having an incredible day today. Today, we're going to prepare a special dish, thick new york style cheesecake. One of my favorites food recipes. For mine, I will make it a little bit tasty. This will be really delicious.

Thick New York Style Cheesecake is one of the most well liked of recent trending meals on earth. It is simple, it is fast, it tastes delicious. It's appreciated by millions every day. They are nice and they look wonderful. Thick New York Style Cheesecake is something that I've loved my whole life.

To get started with this particular recipe, we have to prepare a few ingredients. You can cook thick new york style cheesecake using 16 ingredients and 8 steps. Here is how you can achieve that.

The ingredients needed to make Thick New York Style Cheesecake:

  1. {Take of Crust.
  2. {Make ready of crushed graham crackers (about 12).
  3. {Take of butter.
  4. {Prepare of granulated sugar.
  5. {Take of salt.
  6. {Prepare of vanilla.
  7. {Take of Cheesecake.
  8. {Take of Philadelphia cream cheese (32 oz, get name brand if possible it makes a world of difference) room temp.
  9. {Take of sugar.
  10. {Get of vanilla.
  11. {Prepare of all purpose flour.
  12. {Get of fresh lemon zest.
  13. {Get of fresh lemon juice (do not use bottle doesn’t taste the same).
  14. {Get of salt.
  15. {Make ready of large eggs.
  16. {Prepare of sour cream.

Instructions to make Thick New York Style Cheesecake:

  1. Preheat oven to 375 degrees, wrap a 9 inch springform pan bottle and outside walls with heavy duty aluminum foil making sure seams covered tightly, spray inside with pam.
  2. In a mixing bowl mix crushed graham crackers, melted butter, sugar, salt and vanilla until combined.
  3. Press crust mixture on bottom of pan and slightly up edges as even as possible and bake for 10 minutes.
  4. Take crust out and turn oven down to 325 degrees.
  5. In a mixing bowl beat room temp cream cheese, sugar and flour on medium until smooth. Scrape the sides then add lemon zest, lemon juice, salt and vanilla beating on low until combined. Scrapes sides again adding one egg at a time at low speed until combined, scraping the bowl between eggs if needed. Hand mix in sour cream..
  6. In a large roasting pan (disposable are great for this!) place the spring form pan with crust in center, and carefully pour cheesecake batter into the pan. Poor boiling water around roasting pan careful to not get any in the cheesecake pan until the water is 1 inch up the side..
  7. Put in oven carefully to not splash any water into cheesecake pan. Bake for 1 hour and 45 minutes. Check cheesecake to be done, should be golden/brown on top and wobble but not liquidy..
  8. Remove pan carefully from oven and set to side to cool (keep in water bath) for an hour. Remove from water bath after an hour, remove aluminum foil, cover with plastic wrap and refrigerator overnight (8 hours) before eating.

So that's going to wrap it up for this special food thick new york style cheesecake recipe. Thanks so much for your time. I'm confident you can make this at home. There is gonna be more interesting food at home recipes coming up. Remember to bookmark this page in your browser, and share it to your family, friends and colleague. Thanks again for reading. Go on get cooking!

Recipe of Award-winning Creamy Cheesy Zucchini

Recipe of Award-winning Creamy Cheesy Zucchini

Creamy Cheesy Zucchini.

Creamy Cheesy Zucchini

Hey everyone, it is Jim, welcome to my recipe site. Today, I'm gonna show you how to make a distinctive dish, creamy cheesy zucchini. One of my favorites. This time, I'm gonna make it a little bit tasty. This is gonna smell and look delicious.

Creamy Cheesy Zucchini is one of the most popular of current trending foods in the world. It's simple, it's fast, it tastes yummy. It is enjoyed by millions every day. Creamy Cheesy Zucchini is something that I've loved my entire life. They are fine and they look fantastic.

To begin with this particular recipe, we have to prepare a few components. You can have creamy cheesy zucchini using 8 ingredients and 6 steps. Here is how you can achieve that.

The ingredients needed to make Creamy Cheesy Zucchini:

  1. {Get of zuchinni.
  2. {Take of jalapeno.
  3. {Make ready of yellow or white onion.
  4. {Prepare of roma tomatoes.
  5. {Make ready of philadelphia cream cheese.
  6. {Take of mild chedder or mozzarella cheese.
  7. {Take of Knorr chicken flavor seasoning.
  8. {Make ready of salt and pepper.

Steps to make Creamy Cheesy Zucchini:

  1. Wash vegetables, Cut zucchini in half then squars, mince onion,tomatoe,jalapeno..
  2. Turn pan to medium low heat, add zucchini and about 2 tbs of water,cover with lid till almost done..
  3. After zuchinni is almost done but not completely soft add tomatoes,onion,jalapeno and pinch of salt and pepper cover with lid for about 2min or untill onion and jalapeno are soft..
  4. The dish will have some juice its ok, now add some knorr seasoning 1/2tbs at a time and taste, i didnt really measure..
  5. Add the philadelphia cheese, mix, then add cheese. (I used Tillamook mild chedder) add more cheese if you like, turn heat of when it starts bubbling..
  6. You can also add corn to this its delicious..

So that is going to wrap it up for this special food creamy cheesy zucchini recipe. Thank you very much for reading. I am confident that you can make this at home. There is gonna be interesting food at home recipes coming up. Remember to bookmark this page in your browser, and share it to your family, friends and colleague. Thank you for reading. Go on get cooking!

Recipe of Ultimate Eggplant lasagna with black olive tapenade

Recipe of Ultimate Eggplant lasagna with black olive tapenade

Eggplant lasagna with black olive tapenade.

Eggplant lasagna with black olive tapenade

Hello everybody, it is me again, Dan, welcome to my recipe site. Today, I will show you a way to prepare a distinctive dish, eggplant lasagna with black olive tapenade. One of my favorites food recipes. For mine, I am going to make it a bit unique. This will be really delicious.

Eggplant lasagna with black olive tapenade is one of the most popular of recent trending meals in the world. It is appreciated by millions daily. It's easy, it's fast, it tastes delicious. They are nice and they look fantastic. Eggplant lasagna with black olive tapenade is something that I've loved my whole life.

To begin with this recipe, we must prepare a few components. You can cook eggplant lasagna with black olive tapenade using 19 ingredients and 13 steps. Here is how you cook it.

The ingredients needed to make Eggplant lasagna with black olive tapenade:

  1. {Get of For olive tepenade:.
  2. {Prepare of medium clove garlic.
  3. {Take of black olives.
  4. {Get of capers.
  5. {Make ready of fresh parsley.
  6. {Prepare of fresh lemon juice.
  7. {Prepare of extra virgin olive oil.
  8. {Prepare of black pepper (or less if preferred so).
  9. {Take of Salt.
  10. {Get of Lasagna:.
  11. {Get of small eggplants sliced about 1/4" thick.
  12. {Get of olive oil.
  13. {Take of Salt.
  14. {Make ready of ground black pepper.
  15. {Make ready of marinara sauce.
  16. {Get of ricotta cheese.
  17. {Take of large eggs.
  18. {Take of grated parmesan cheese.
  19. {Make ready of grated mozzarella cheese.

Steps to make Eggplant lasagna with black olive tapenade:

  1. Olive tepenade: Combine all ingredients(except salt) in a food processor, and blitz until a paste is formed.
  2. Season with salt to taste(check the level of salt needed, do not add salt while processing the ingredients).
  3. Lasagna: pre heat the oven to 350 degree Fahrenheit.
  4. Slice eggplant into thin strips and place on a baking sheet.
  5. Brush with olive oil and sprinkle with salt and pepper.
  6. Roast in the oven until tender, about 10 minutes..
  7. Mix together Ricotta cheese, eggs, and Parmesan cheese in a separate bowl..
  8. Prepare a large baking dish with non-stick cooking spray and begin layering lasagna.
  9. Layer the Marinara sauce, cheese mixture, eggplant, cheese mixture, sauce and then top with Mozzarella cheese.
  10. Layer a generous amount of olive tepenade prepared on the surface.
  11. Bake until about 30 minutes or until done.
  12. Let cool for sometime before you can slice and divide portions.
  13. Serve warm.

So that's going to wrap this up for this special food eggplant lasagna with black olive tapenade recipe. Thanks so much for reading. I am confident you can make this at home. There's gonna be interesting food in home recipes coming up. Remember to save this page on your browser, and share it to your family, colleague and friends. Thanks again for reading. Go on get cooking!

Recipe of Any-night-of-the-week Hungarian Goulash

Recipe of Any-night-of-the-week Hungarian Goulash

Hungarian Goulash.

Hungarian Goulash

Hey everyone, I hope you are having an incredible day today. Today, I'm gonna show you how to make a special dish, hungarian goulash. One of my favorites. This time, I am going to make it a bit tasty. This is gonna smell and look delicious.

Hungarian Goulash is one of the most popular of current trending meals in the world. It is appreciated by millions daily. It is easy, it's fast, it tastes yummy. Hungarian Goulash is something that I have loved my entire life. They are fine and they look wonderful.

To begin with this particular recipe, we have to first prepare a few components. You can have hungarian goulash using 17 ingredients and 6 steps. Here is how you can achieve it.

The ingredients needed to make Hungarian Goulash:

  1. {Make ready 5 of medium beef fillets cut into smaller pieces.
  2. {Get 3 of diced potatoes.
  3. {Take 2 of medium carrots diced.
  4. {Get 2 tbsp of tomato paste.
  5. {Take 2 of bayleaves.
  6. {Get of Mixed spices.
  7. {Make ready of Curry.
  8. {Get of Curry masala.
  9. {Get of Salt.
  10. {Make ready cube of Stock.
  11. {Take 1 of scotch bonnet.
  12. {Get 4 of green beans cut into two.
  13. {Prepare 2 of medium Onions.
  14. {Take 1/8 tsp of black pepper.
  15. {Get 1/2 tsp of Ginger and garlic paste.
  16. {Make ready 1 of small green bell pepper.
  17. {Prepare 1 1/2 cup of water add if necessary.

Instructions to make Hungarian Goulash:

  1. Prepare your ingredients. Heat little oil and fry your beef with little salt until tender.
  2. Add your onions.
  3. Bayleaves and all your spices fry for 5mins then add your carrots green beans and potatoes.
  4. Add water, tomato paste stock cube and mix.
  5. Add 1/2 tbsp butter and cover to cook for 15-20mins. After you're done turn off flame then add in your diced green bell pepper and cover for 5mins.
  6. And here we gaaaaoo again😋😋. Best served warm. Can also serve over rice, couscous or any other meal of your choice..

So that's going to wrap this up for this exceptional food hungarian goulash recipe. Thank you very much for reading. I am confident you can make this at home. There's gonna be interesting food at home recipes coming up. Don't forget to save this page on your browser, and share it to your loved ones, friends and colleague. Thanks again for reading. Go on get cooking!

Recipe of Super Quick Homemade Cheesy guacamole strawberry open sandwich

Recipe of Super Quick Homemade Cheesy guacamole strawberry open sandwich

Cheesy guacamole strawberry open sandwich.

Cheesy guacamole strawberry open sandwich

Hey everyone, it's Brad, welcome to our recipe site. Today, I will show you a way to prepare a special dish, cheesy guacamole strawberry open sandwich. One of my favorites. This time, I will make it a bit tasty. This will be really delicious.

Cheesy guacamole strawberry open sandwich is one of the most well liked of current trending foods in the world. It's enjoyed by millions daily. It is simple, it's fast, it tastes delicious. They are nice and they look fantastic. Cheesy guacamole strawberry open sandwich is something that I have loved my whole life.

To get started with this recipe, we must first prepare a few components. You can have cheesy guacamole strawberry open sandwich using 14 ingredients and 5 steps. Here is how you cook that.

The ingredients needed to make Cheesy guacamole strawberry open sandwich:

  1. {Prepare of brown bread slices.
  2. {Prepare of ripe avocado.
  3. {Take of strawberries.
  4. {Make ready of freshly prepared cottage cheese.
  5. {Take of salt.
  6. {Make ready of black pepper powder.
  7. {Take of medium sized onion chopped.
  8. {Take of small tomato chopped.
  9. {Take of green chilli chopped.
  10. {Get of chaat masala.
  11. {Take of roasted cumin powder.
  12. {Get of finely chopped coriander leaves.
  13. {Prepare of lemon juice.
  14. {Prepare of butter/oil for brushing the tawa.

Steps to make Cheesy guacamole strawberry open sandwich:

  1. Cut the avocado from the middle and remove the pulp with the help of a spoon..
  2. Mash it with a fork and add the remaining ingredients in it except the butter, cottage cheese and strawberry..
  3. Spread this over the bread slice and put some cottage cheese and strawberry on it and sprinkle some chaat masala over it..
  4. Brush the tawa with butter or oil as no toast the bread for 2 minutes in medium flame..
  5. Now your cheesy guacamole strawberry open sandwich is ready. Serve hot..

So that is going to wrap this up with this special food cheesy guacamole strawberry open sandwich recipe. Thanks so much for reading. I am confident that you can make this at home. There is gonna be interesting food at home recipes coming up. Don't forget to save this page on your browser, and share it to your family, friends and colleague. Thanks again for reading. Go on get cooking!

Recipe of Perfect Mike's Garlic Mushroom Asian Noodles

Recipe of Perfect Mike's Garlic Mushroom Asian Noodles

Mike's Garlic Mushroom Asian Noodles.

Mike's Garlic Mushroom Asian Noodles

Hey everyone, hope you're having an incredible day today. Today, I will show you a way to prepare a special dish, mike's garlic mushroom asian noodles. One of my favorites food recipes. For mine, I am going to make it a bit unique. This will be really delicious.

Mike's Garlic Mushroom Asian Noodles is one of the most popular of current trending meals on earth. It's enjoyed by millions every day. It is simple, it is fast, it tastes yummy. They're nice and they look wonderful. Mike's Garlic Mushroom Asian Noodles is something which I've loved my entire life.

To begin with this particular recipe, we have to first prepare a few ingredients. You can cook mike's garlic mushroom asian noodles using 33 ingredients and 7 steps. Here is how you can achieve that.

The ingredients needed to make Mike's Garlic Mushroom Asian Noodles:

  1. {Prepare of ● For The Noodle Options [size of a quarter in hand per serving].
  2. {Take of Udon Noodles.
  3. {Prepare of Canton Noodles.
  4. {Take of Egg Noodles.
  5. {Get of Ramen Noodles.
  6. {Get of Buckwheat Noodles.
  7. {Get of Kan-To Noodles.
  8. {Get of Fettuccine Noodles.
  9. {Get of Linguine Noodles.
  10. {Take of Spaghetti Noodles.
  11. {Get of ● For The Mushrooms.
  12. {Make ready of Thin Sliced Dried Shiitake Mushrooms.
  13. {Get of Small Dried Button Mushrooms.
  14. {Make ready of ● For The Garlic Sauce Mixture.
  15. {Take of Garlic Mixture [see my recent recipie].
  16. {Take of Salted Butter.
  17. {Get of Housin Sauce.
  18. {Make ready of Oyster Sauce.
  19. {Get of Quality Fish Sauce.
  20. {Prepare of Soy Sauce.
  21. {Take of ● For The Vegetables Seasonings & Herbs [all added last].
  22. {Prepare of Fresh Cilantro [+ reserves for garnish ].
  23. {Get of Dried Thai Basil.
  24. {Take of Fresh Chopped Green Onions.
  25. {Take of Fresh Ground Black Pepper.
  26. {Take of Toasted Sesame Seeds.
  27. {Get of ● For The Options [to taste or as needed].
  28. {Make ready of Fresh Grated Ginger.
  29. {Make ready of Sesame Seeds.
  30. {Get of Crispy Super Thin Sliced Cabbage.
  31. {Get of Dried Thai Chilies.
  32. {Get of Various Seafoods.
  33. {Take of Garlic Olive Oil.

Instructions to make Mike's Garlic Mushroom Asian Noodles:

  1. Here's what you'll need in steps one and two. Various noodles pictured. Choose a heavier weight noodle. Avoid noodles such as rice noodles..
  2. Cilantro, fresh black pepper and dried Thai Basil pictured..
  3. Place your mushrooms in a boiling pot with a good dash of salt and a splash of olive oil. Don't worry if your water turns a bit brown. Simmer on high for 5 minutes.Then add your noodles. Then add your noodles. Boil as per manufactures directions..
  4. Drain and place back in pot immediately..
  5. Add your garlic mixture and butter and mix well quickly..
  6. Add everything else to your pot, mix well and cover tightly for 5 minutes..
  7. Garnish with cilantro leaves and top with toasted sesame seeds. Drizzle top with garlic olive oil. Serve with additional soy and fish sauce. Enjoy!.

So that's going to wrap it up with this exceptional food mike's garlic mushroom asian noodles recipe. Thanks so much for reading. I am confident that you can make this at home. There is gonna be more interesting food in home recipes coming up. Remember to save this page on your browser, and share it to your loved ones, colleague and friends. Thanks again for reading. Go on get cooking!

Recipe of Homemade Russian Beef Stroganoff

Recipe of Homemade Russian Beef Stroganoff

Russian Beef Stroganoff.

Russian Beef Stroganoff

Hey everyone, it's me, Dave, welcome to my recipe site. Today, I'm gonna show you how to make a distinctive dish, russian beef stroganoff. One of my favorites food recipes. For mine, I am going to make it a little bit tasty. This is gonna smell and look delicious.

Russian Beef Stroganoff is one of the most well liked of current trending foods in the world. It's easy, it's quick, it tastes delicious. It is enjoyed by millions daily. Russian Beef Stroganoff is something which I have loved my entire life. They are fine and they look wonderful.

To begin with this recipe, we must first prepare a few components. You can have russian beef stroganoff using 12 ingredients and 8 steps. Here is how you cook it.

The ingredients needed to make Russian Beef Stroganoff:

  1. {Take 4 tablespoons of butter, divided.
  2. {Prepare 1 of onion, chopped.
  3. {Get 4 cloves of garlic, crushed or minced.
  4. {Make ready 1 pound (500 grams) of sliced mushrooms.
  5. {Take 24 ounces (700 grams) of lean beef fillet steaks, seasoned with salt and pepper and cubed into 1 1/2-inch piece.
  6. {Take 2 teaspoons of dijon mustard.
  7. {Make ready 1 teaspoon of paprika, (smoky or mild).
  8. {Get to taste of Salt and pepper.
  9. {Take 1 cup of light sour cream at room temperature, (or reduced-fat cooking cream).
  10. {Take 2 cups of beef broth (or stock), (or 2 cups water mixed with 1 tablespoon vegetable stock powder).
  11. {Make ready 2 tablespoons of flour.
  12. {Make ready of Freshly chopped parsley to garnish.

Steps to make Russian Beef Stroganoff:

  1. Melt 2 tablespoons of butter in a large non-stick frying pan over medium heat. Sear the steak in single layer batches until browned; transfer to a separate plate and set aside until all batches are done..
  2. Melt the remaining butter in the pan; add the onions and sauté until transparent, then add the garlic and fry until just fragrant (about 30 seconds)..
  3. Add the mushrooms and cook until the mushrooms are tender and cooked through (about 4 minutes). Mix in the mustard and paprika..
  4. Stirring occasionally to mix all of the flavours through, deglazing the pan while scraping any browned bits off the bottom of the pan with your spoon..
  5. Grab a small jug and whisk together the beef broth (or stock) with flour until smooth. Pour the beef broth mixture into the pan, mix well and bring to a simmer for about 5 minutes, stirring occasionally until the sauce begins to thicken..
  6. Return the beef and any juices from the plate to the pan and season with any extra salt and pepper (if desired). Reduce heat down to low and mix in sour cream. Heat until hot (do not boil)..
  7. Serve it with rice, pasta or noodles and garnish it with parsley..
  8. Tag @appetizing.adventure on Instagram if you make this!.

So that's going to wrap this up with this special food russian beef stroganoff recipe. Thank you very much for your time. I am confident you will make this at home. There's gonna be more interesting food in home recipes coming up. Don't forget to bookmark this page on your browser, and share it to your family, colleague and friends. Thanks again for reading. Go on get cooking!

Recipe of Favorite Teriyaki Glaze/ Marinade and Finishing Sauce

Recipe of Favorite Teriyaki Glaze/ Marinade and Finishing Sauce

Teriyaki Glaze/ Marinade and Finishing Sauce.

Teriyaki Glaze/ Marinade and Finishing Sauce

Hey everyone, it is John, welcome to our recipe site. Today, we're going to make a special dish, teriyaki glaze/ marinade and finishing sauce. One of my favorites food recipes. For mine, I am going to make it a bit unique. This is gonna smell and look delicious.

Teriyaki Glaze/ Marinade and Finishing Sauce is one of the most well liked of current trending meals on earth. It's easy, it is quick, it tastes delicious. It is enjoyed by millions daily. Teriyaki Glaze/ Marinade and Finishing Sauce is something that I have loved my whole life. They're fine and they look wonderful.

To begin with this particular recipe, we have to first prepare a few ingredients. You can cook teriyaki glaze/ marinade and finishing sauce using 9 ingredients and 3 steps. Here is how you can achieve it.

The ingredients needed to make Teriyaki Glaze/ Marinade and Finishing Sauce:

  1. {Make ready 1/4 cup of tamari sauce, any soy sauce can be used.
  2. {Make ready 2 tbsp of light brown sugar, packed.
  3. {Make ready 1 tbsp of mirin.
  4. {Make ready 5 tbsp of seasned rice vinegar.
  5. {Get 1 tbsp of chili sauce with garlic.
  6. {Prepare 1/4 tsp of ground ginger.
  7. {Prepare 2 tbsp of peanut or canola oil.
  8. {Make ready 2 cloves of garlic.
  9. {Get 2 of green onions.

Instructions to make Teriyaki Glaze/ Marinade and Finishing Sauce:

  1. Combine all ingredients in a food processor or blender until well blended.
  2. This flavorful sauce makes a great marinade for meats and seafood before cooking. It's equally good as a brush on glaze for vegetables and any grilled meat or fish or shellfish. It's a perfect finishing sauce for the sous vide style of cooking by providing a nice glaze for a final browning of meats..
  3. This keeps covered, refrigerated up to 10 days..

So that's going to wrap this up with this exceptional food teriyaki glaze/ marinade and finishing sauce recipe. Thank you very much for your time. I am sure that you can make this at home. There's gonna be more interesting food at home recipes coming up. Don't forget to bookmark this page in your browser, and share it to your family, friends and colleague. Thank you for reading. Go on get cooking!

Easiest Way to Make Ultimate Baked corned beef

Easiest Way to Make Ultimate Baked corned beef

Baked corned beef.

Baked corned beef

Hello everybody, it is me again, Dan, welcome to our recipe page. Today, we're going to prepare a special dish, baked corned beef. It is one of my favorites food recipes. This time, I am going to make it a bit unique. This is gonna smell and look delicious.

Baked corned beef is one of the most well liked of recent trending foods on earth. It's simple, it is quick, it tastes yummy. It's appreciated by millions daily. They are fine and they look wonderful. Baked corned beef is something which I've loved my whole life.

To get started with this particular recipe, we must first prepare a few ingredients. You can cook baked corned beef using 4 ingredients and 5 steps. Here is how you can achieve it.

The ingredients needed to make Baked corned beef:

  1. {Prepare of corned beef.
  2. {Get of spicy brown mustard.
  3. {Prepare of light brown sugar.
  4. {Prepare of minced garlic.

Steps to make Baked corned beef:

  1. Preheat oven to 350 convection Rinse corned beef and dispose (or save if you're like me) the packet of seasoning.
  2. Lay foil out and put beef down with fat side UP.
  3. Baste in spicy brown mustard, brown sugar and minced garlic.
  4. Wrap tightly and place on cookie sheet.
  5. Cook 30 minutes per pound, when at temp open dump juices and place under broil until golden. Enjoy!.

So that is going to wrap it up with this exceptional food baked corned beef recipe. Thank you very much for your time. I'm confident you will make this at home. There's gonna be interesting food at home recipes coming up. Don't forget to save this page in your browser, and share it to your loved ones, colleague and friends. Thank you for reading. Go on get cooking!